
Lighting control (Relight)
Relight a finished image by placing lights on it. Add as many lights as you need, drag them into place and set their direction, intensity and color.
Light types
| Type | Behavior |
|---|---|
| Omni | Point light shining in all directions. |
| Direct | Focused key light with a clear direction. |
| Sun | Strong, parallel daylight. |
| Ambient | Soft fill that lifts shadows everywhere. |
| Rim | Back light that outlines the silhouette. |
| Area | Large, soft source such as a window or a sign. |
| Gobo | Light through a blocking pattern, casting patterned shadows. |
| Practical | A light source inside the scene, such as a lamp or a neon sign. |
Placing and adjusting lights
- Press + in the Relight panel to add a light; select a light and delete it to remove it.
- Drag the center handle to move the light; drag the outer handle to rotate its direction.
- Set intensity, color temperature (cool to warm) and radius (how soft the light spreads) for each light.
Presets
Start from one of 17 presets and adjust from there: Rembrandt, Paramount, Loop, Split, 3-Point, Low-Key, Neon, Golden Hour, Blue Hour, Overcast, Harsh Sunlight, Soft Side Light, Dramatic Rim, God Rays, Under Light, High-Key and Dramatic Spot. Applying a preset replaces the current lights.
Which model to use
Relight works with every image model in MergeRef. We recommend the Gemini models (Nano Banana): the tool was built and tested with them.
Relight does not run a lighting model of its own. It turns the lights you place into a precise lighting instruction and sends it to the model you picked, with your original image. You get that model’s quality and style, with lighting you set light by light. Photoshop’s Relight (in Photoshop Beta) works differently: it removes the existing lighting and re-creates it with Adobe’s own generative service, with up to three lights and generative credits for each render (Adobe announcement). In MergeRef there is no limit on lights, and each light has its own type, direction, intensity, color, shadow, spread, highlight, area and atmosphere.
How it works
Image models do not follow exact numbers, percentages or hex colors reliably. So MergeRef never sends the slider values. It translates each light into named words a model understands:
- Direction: Direct and Sun lights use eight directions, such as “from upper left”. Other lights use their place on the image, such as “from top right”.
- Strength and character: intensity, color temperature, shadow, spread and highlights each map to a few named steps, such as “soft”, “very bright”, “warm” or “hard shadows”. Middle values are left out, so the sentence only carries what you changed.
- Color: a light color becomes a color name, such as “cool blue”. Near-white colors are left out.
- Presets add their name, such as “Rembrandt lighting”, in front of the light list.
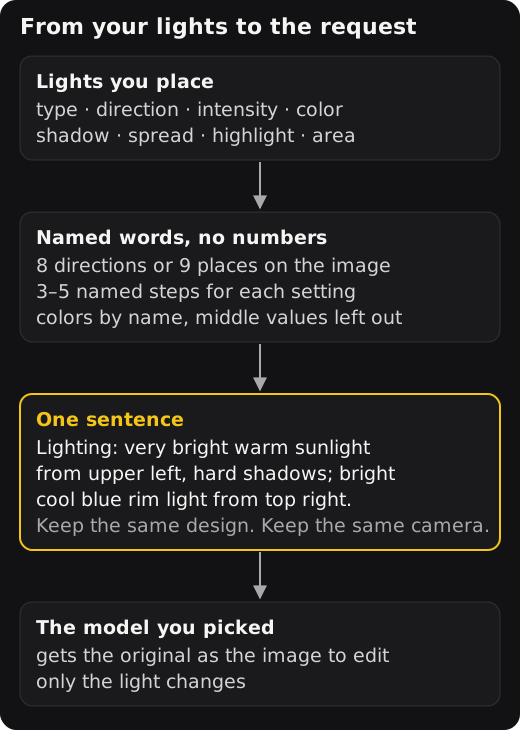
The sentence ends with “Keep the same design. Keep the same camera.” MergeRef sends it the same way as a prompt you type in the prompt panel: the original is marked as the image to edit, so faces, outfits and the background stay the same and only the light changes.
Example: a warm sun from the upper left with hard shadows, plus a blue rim light.